Rates Overview
In this course we will give you a quick overview of how to setup your rates.
On the Good Journey Platform you can setup three types of rates for ground transportation.
- Regular - point to point service where the fare is based on distance and time.
- Flat - zone to zone or zip code to zip code service where the fare is fixed price.
- Hourly - hourly service charging by various packages such as 2 hours, half day or full day.
Naming Conventions
When you create a new rate it's important to establish best practices so it's easy to lookup existing rates and make updates if needed.
Best practice naming convention:
<Car-type> - <Operation Zone>
For example you may want to create a new rate for Sedan service in California. Here's how you would name the rate.
Sedan - California
Next we will go over how to setup each rate type.
Video Tutorial
How to add a rate
- Navigate to settings
- Navigate to Rate
- Select the rate type (regular, flat or hourly)
- Tap on the Add button

How to setup regular rates
Regular rates are useful if you want to charge based on distance and time.
Parameters:
- Starting fee - the starting fee
- Fee per distance - the fee per km or mi
- Fee per minute - the fee per min
- Minimum fee - the minimum fee the customer must pay for each trip.
- You can also set a range distance range to charge a different fee per distance. For example:
- 0 - 5 km, you charge $0.4
- 5-8 km, you charge $0.5
- 8-∞ you charge $0.6
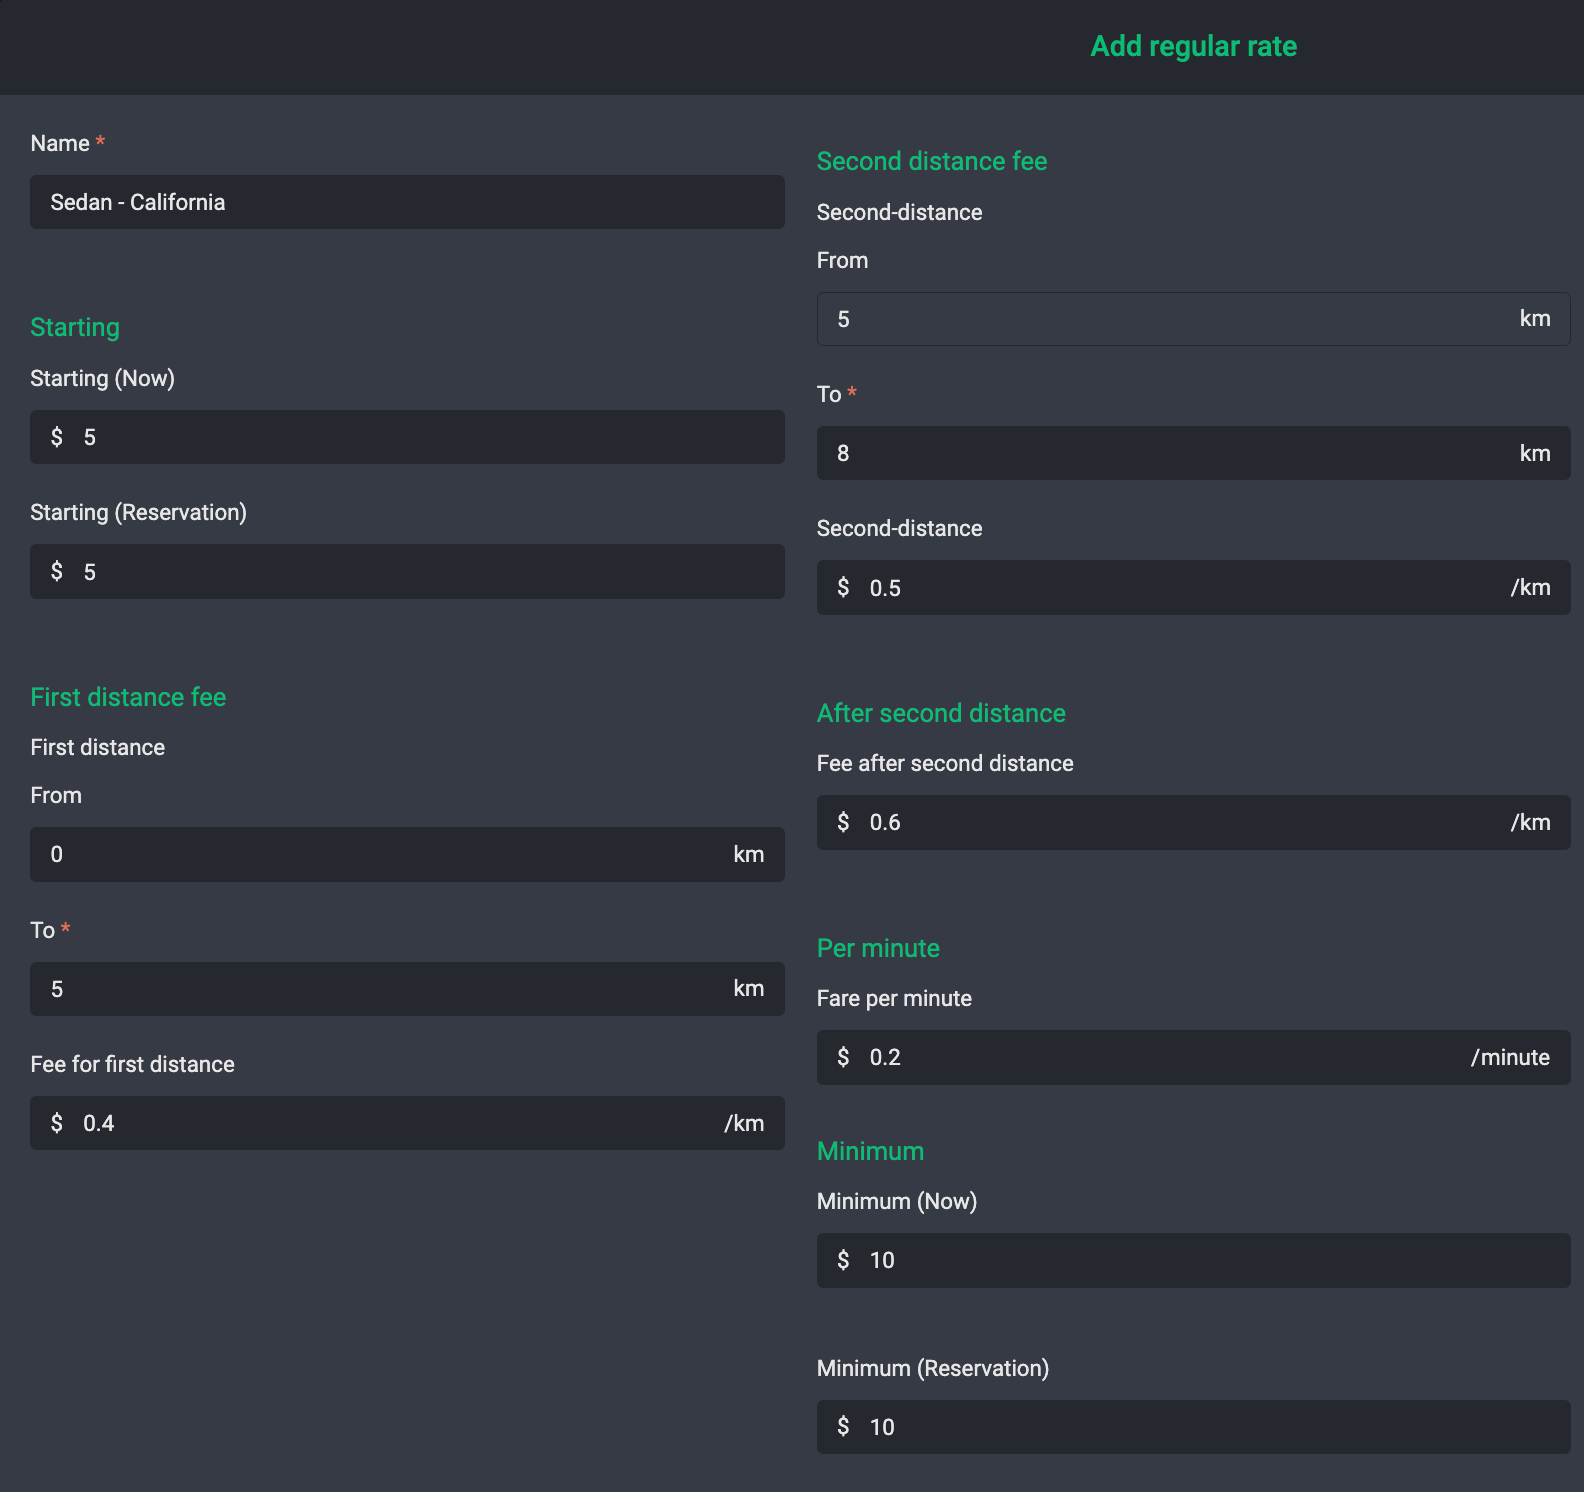
Formula
Basic fare = Starting fee + (total distance x fee per km) + (total time x fee per min)
Total fare = MAX(minimum fee, basic fare)
Example:
- Minimum fee = $10
- Starting fee = $5
- Fee per distance = $0.5
- Fee per minute = $0.2
Let say the total ride took 2.5km and 2.5 minutes to get there.
Basic fare = $5 + (2.5 x 0.5) + (2.5 x 0.2) = 6.75
Total fare = MAX(10, 6.75) = $10
Since the final fare is less than the minimum fee, the customer must pay a $10.
How to setup flat rates
Flat rates are useful if you want to charge your customers a fixed rate between two areas or zones.
Step 1. Create zones
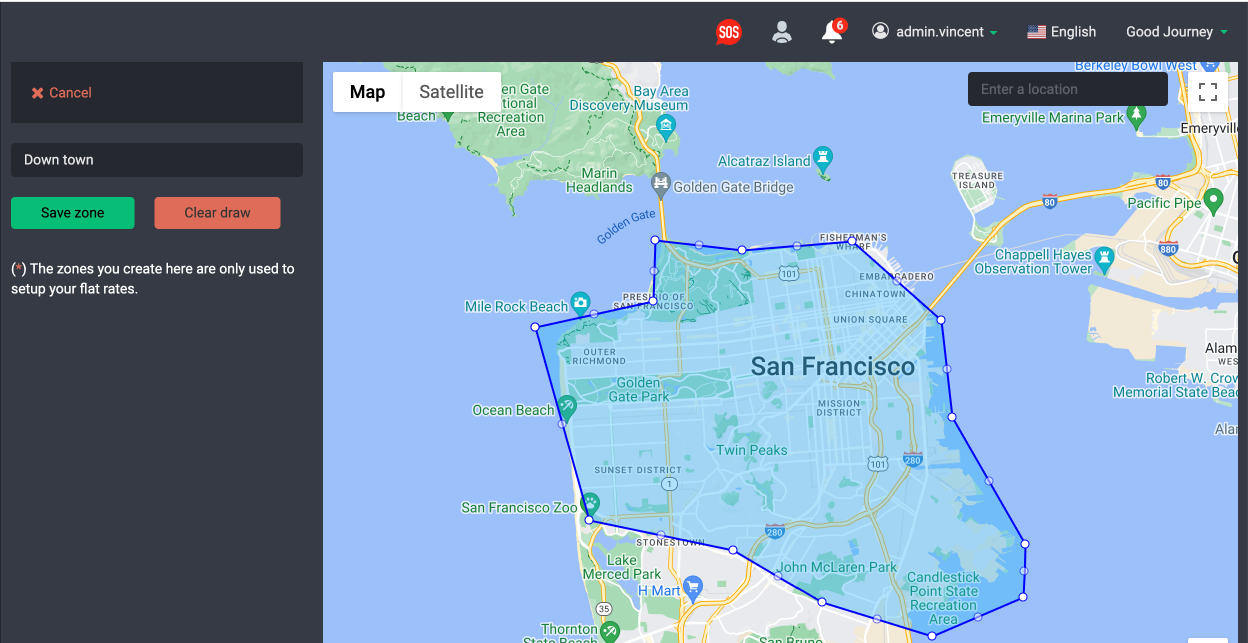
Before you create a flat rate you need to create zones. For example maybe you want to charge a flat fee from airport to city center. To create a zone navigate to Settings > Zone
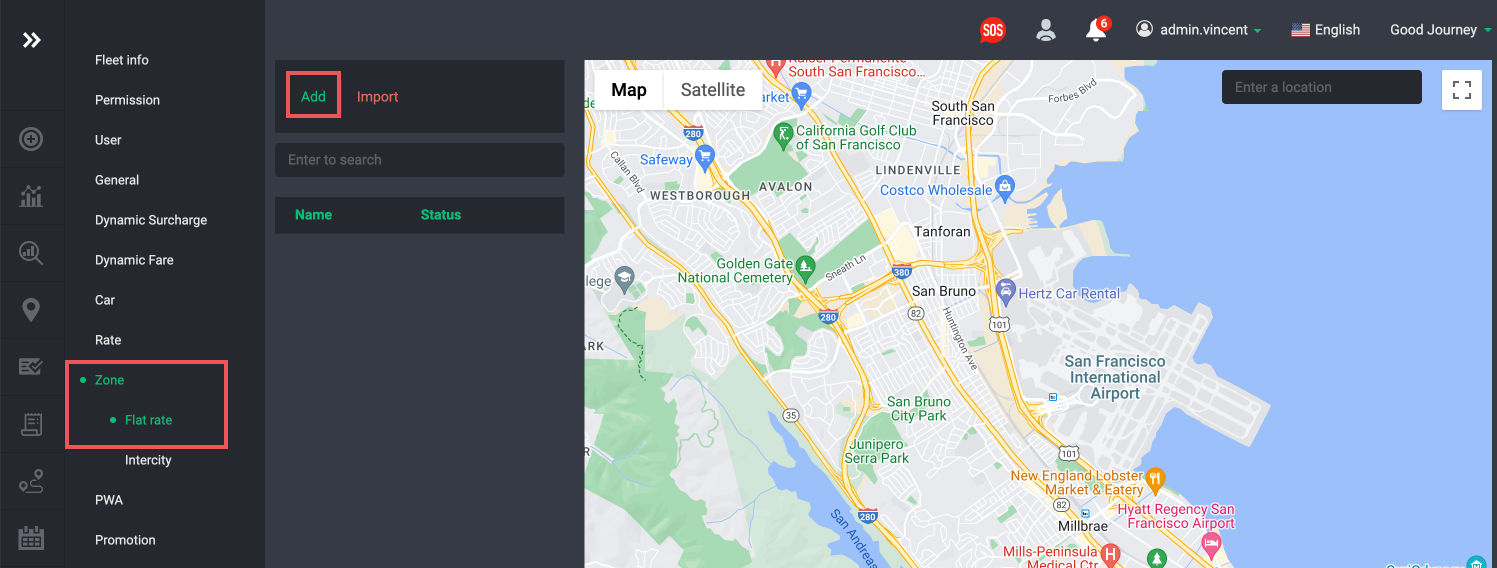
Let say you want to create a fix price from San Francisco International Airport to SF Down town. To do this you must first define two zones. Click on the Add button to create a new zone.
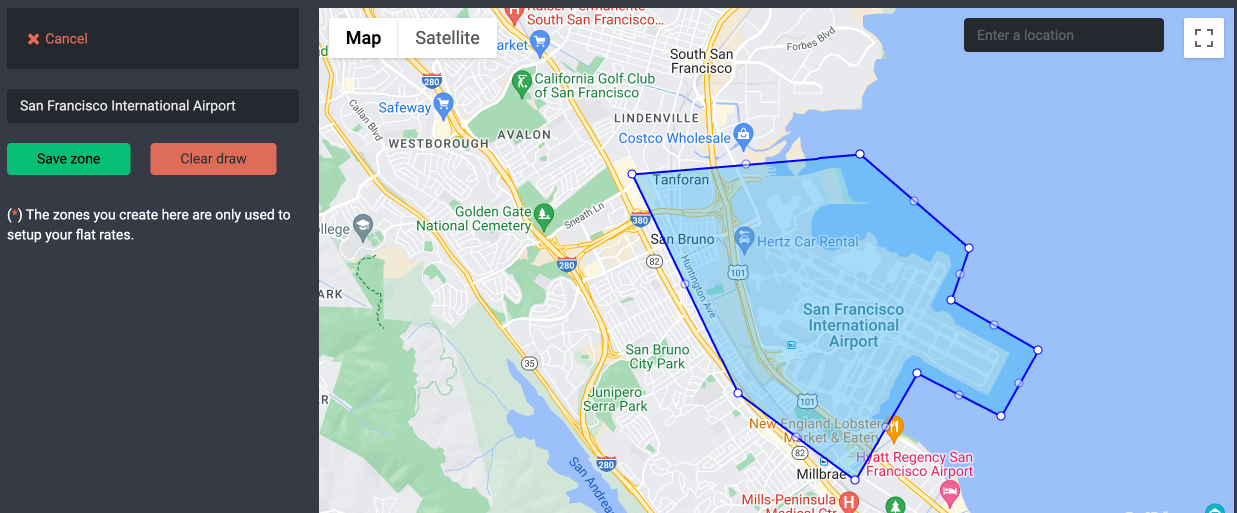
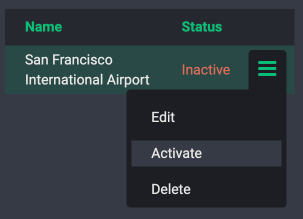
As shown you just name the zone, and draw the polygon. You can adjust the polygon if needed. Once you create a zone make sure you activate it.
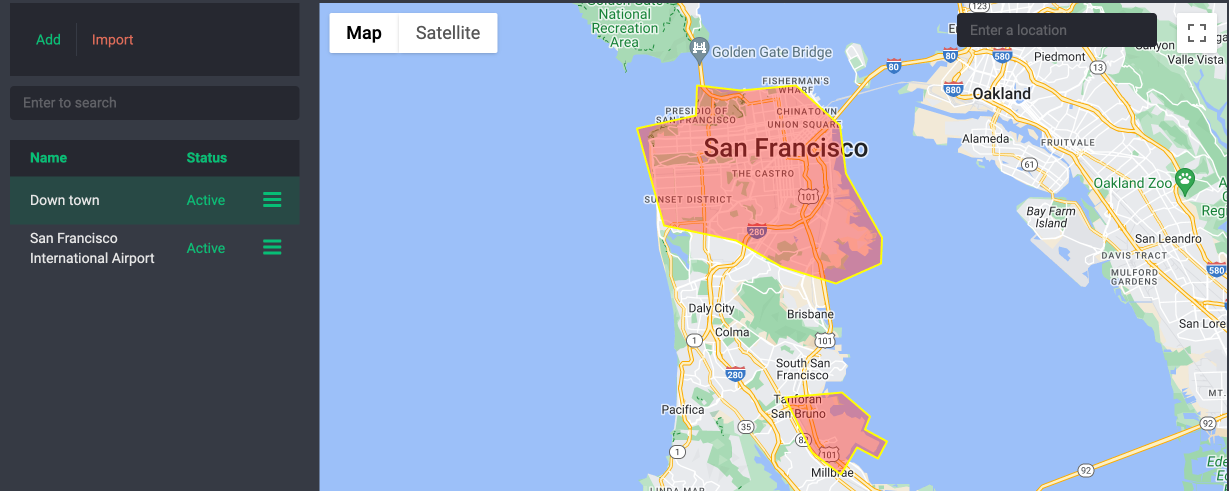
Next create another zone. Let say Downtown zone.
Once activated, your two zones should look like this:
Now you have two zones setup, it is time to look at how to create a fixed rate.
Step 2. Create Flat Rate
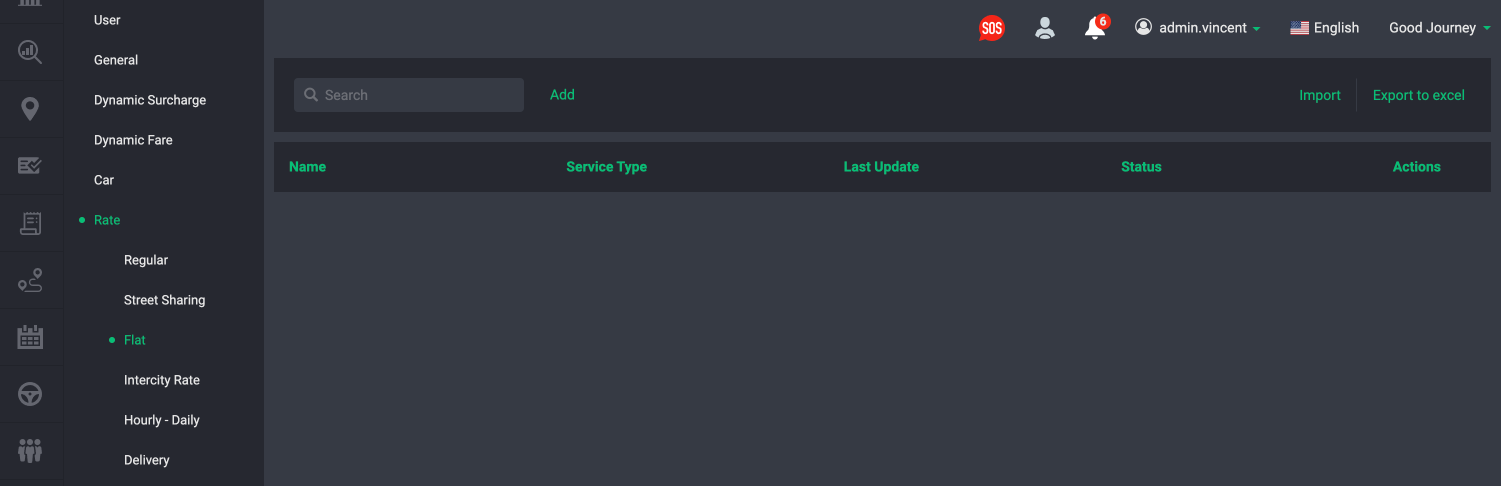
To create a flat rate, navigate to Settings > Rate > Flat. Tap on the Add button
Next name your flat rate. Typically you would name this the car-type you will assign this rate to, for example Sedan.
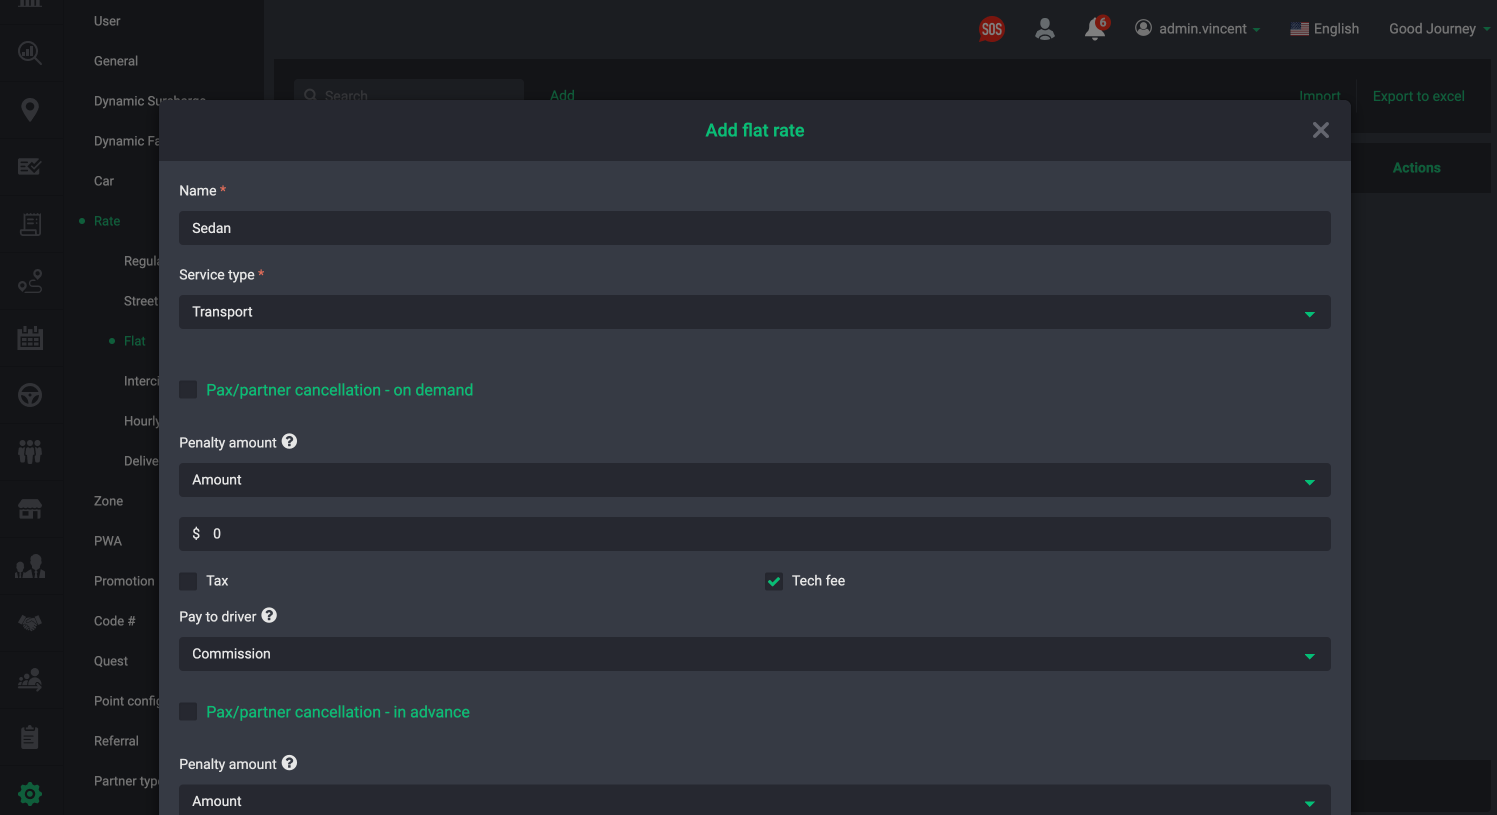
If you want to setup cancellation and no-show policy you can also do so here in the future. Scroll down and click Save
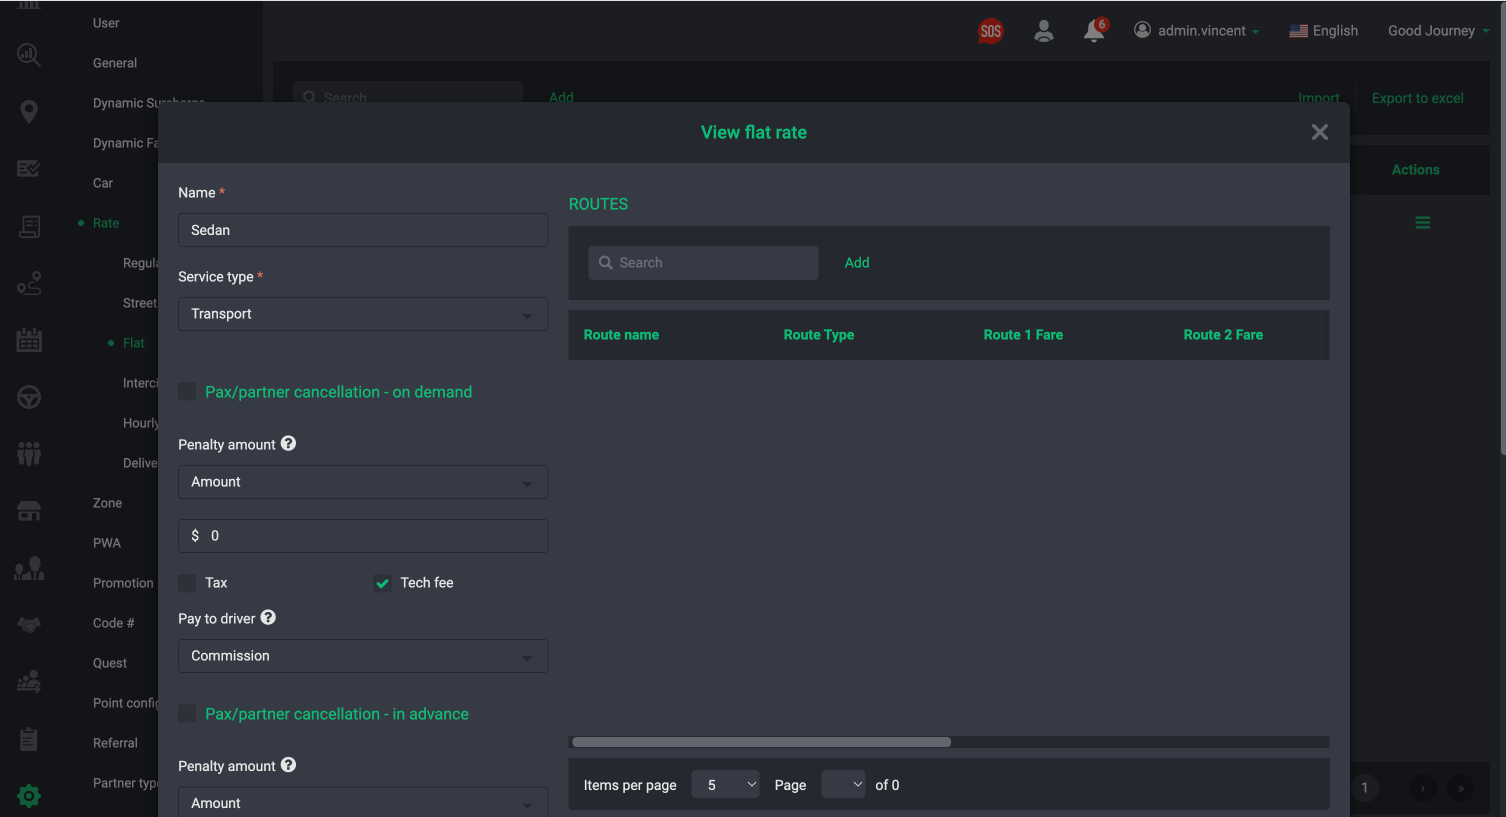
Now that you have created your flat rate shell you can now add as many routes you need to this rate. So all the zone to zone or zip to zip routes will apply to this specific car-type Sedan.
Step 3. Creating a route
Within the flat rate, you can create as many routes. Tap on the Add button.
Best practice to name your route between two zones so it's easy for your dispatcher and customers to see.
For example between SFO to Downtown.
- Here you can setup the route type either zone to zone, or zip to zip.
- You select the two zones you want to charge a fixed rate.
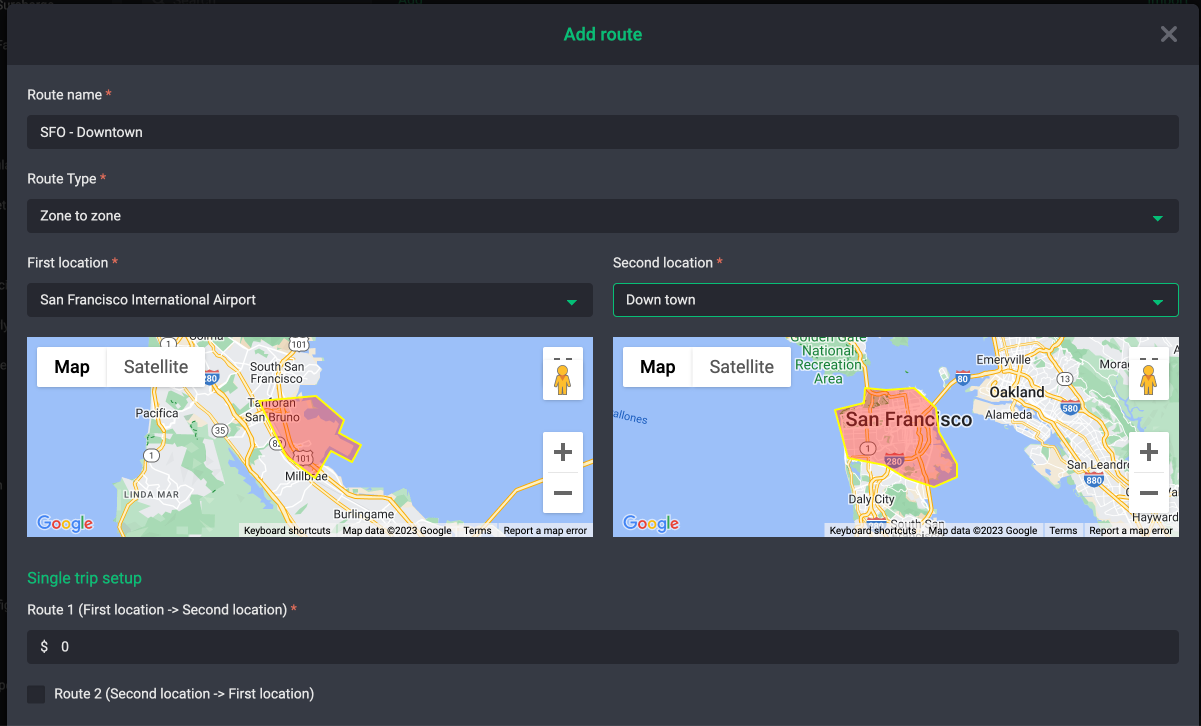
You have the option to charge different fix rates between two zones going one way and the opposite way! You can even add a limitation. For example this fix rate only covers a certain distance and duration before you charge extra fees.
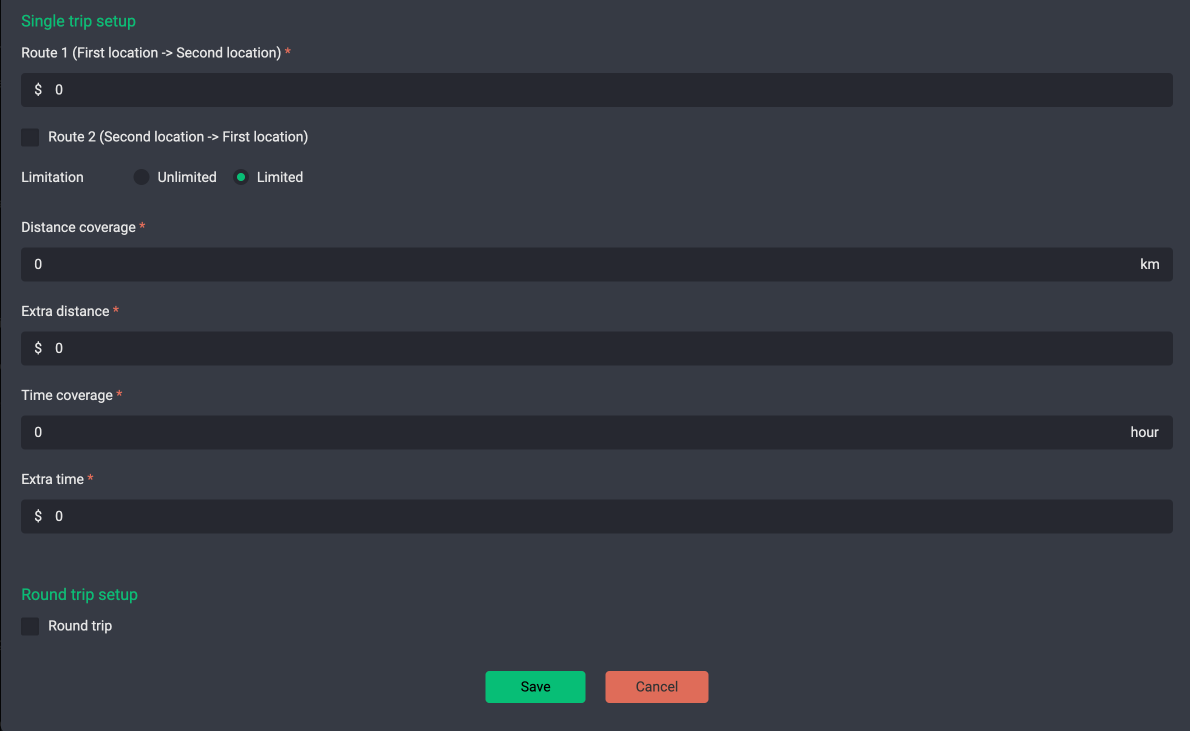
Once done, save your work! That's all there is to creating flat rates!
Note: Flat rate pricing will always have priority over regular rate pricing. On the dispatching portal you can choose the rate type. However on the customer app we will priority flat rate over regular rates.
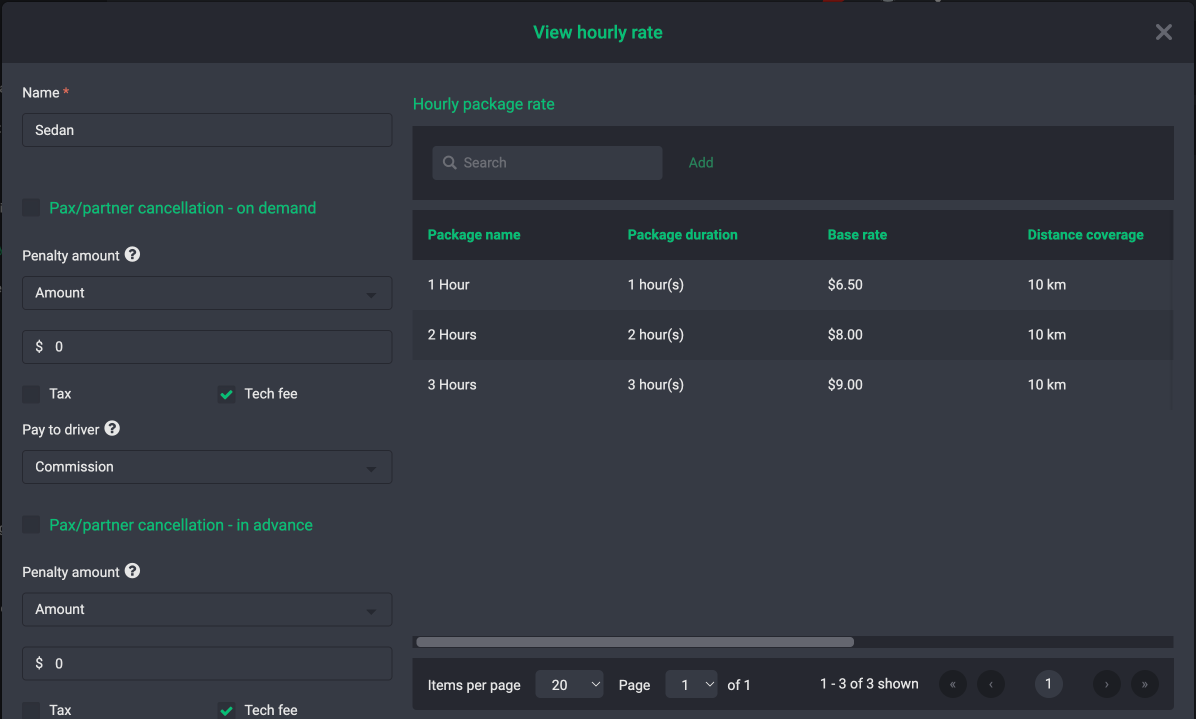
How to setup hourly rates
Hourly rates are useful if you want to charge your customer an hourly service. This is typically when a customer hires or rents a driver for a few hours. This could also be useful to setup tour packages.
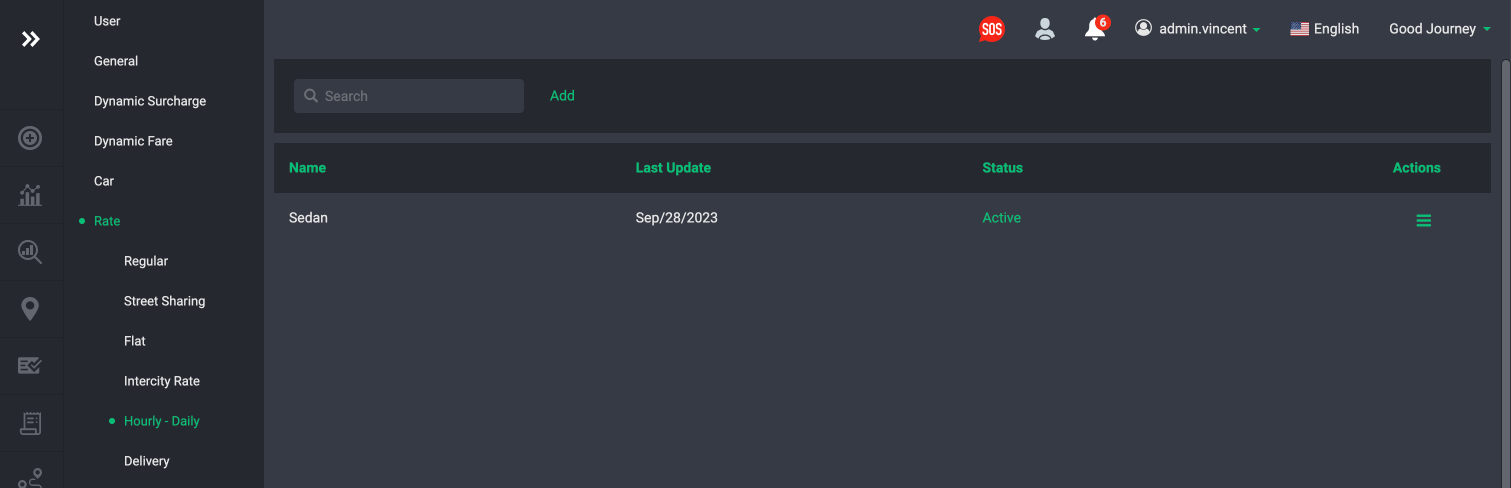
By now you should be familiar with setting up regular and flat rates. Hourly rates work the same way. Navigate to Settings > Rate > Hourly -Daily. Click the Add button.
Once you create your hourly rate, you can manage the hourly packages within the rate. For example below you can setup 3 packages for 1, 2, and 3 hours.
Adding a new package
When you add a new package here are the different hourly parameters you can set:
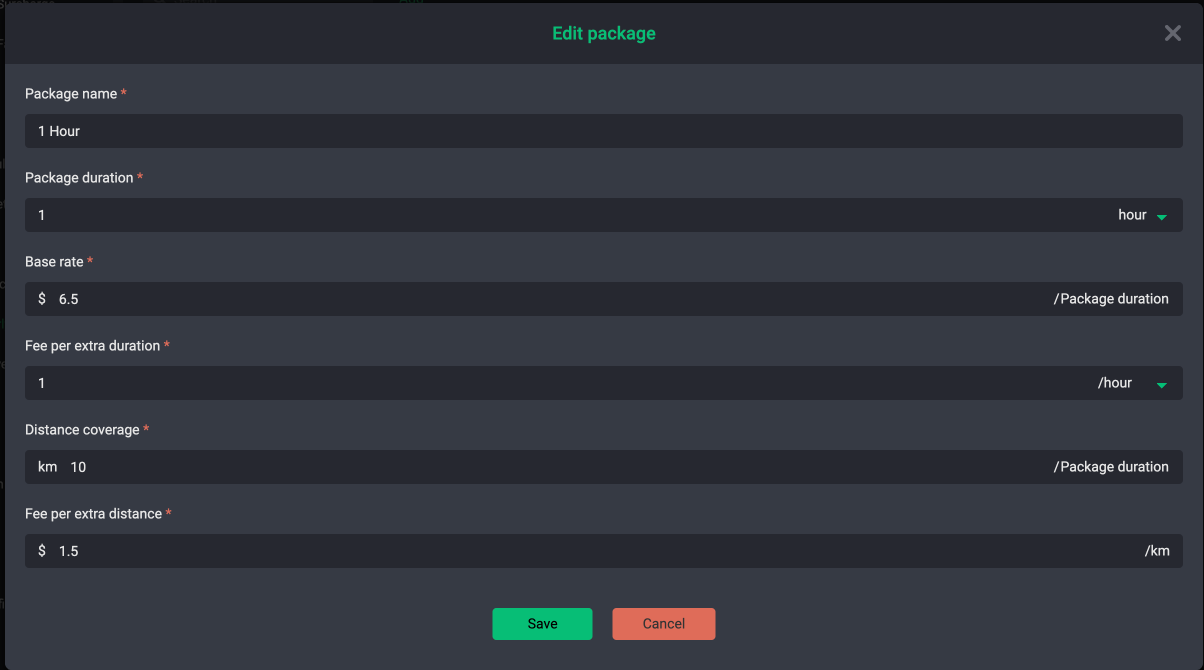
- Package duration
- You have the option to round up to the next hour, or charge per minute.
- Base rate
- The total fare the customer will pay for this package duration.
- Fee per extra duration
- The extra fee after the maximum duration covered.
- Distance coverage
- The total distance covered for this package.
- Fee per extra distance
- The extra fee you charge after maximum distance covered.
That's how you create an hourly rate! Once your rates are created you can assign the rates to a specific car-type.
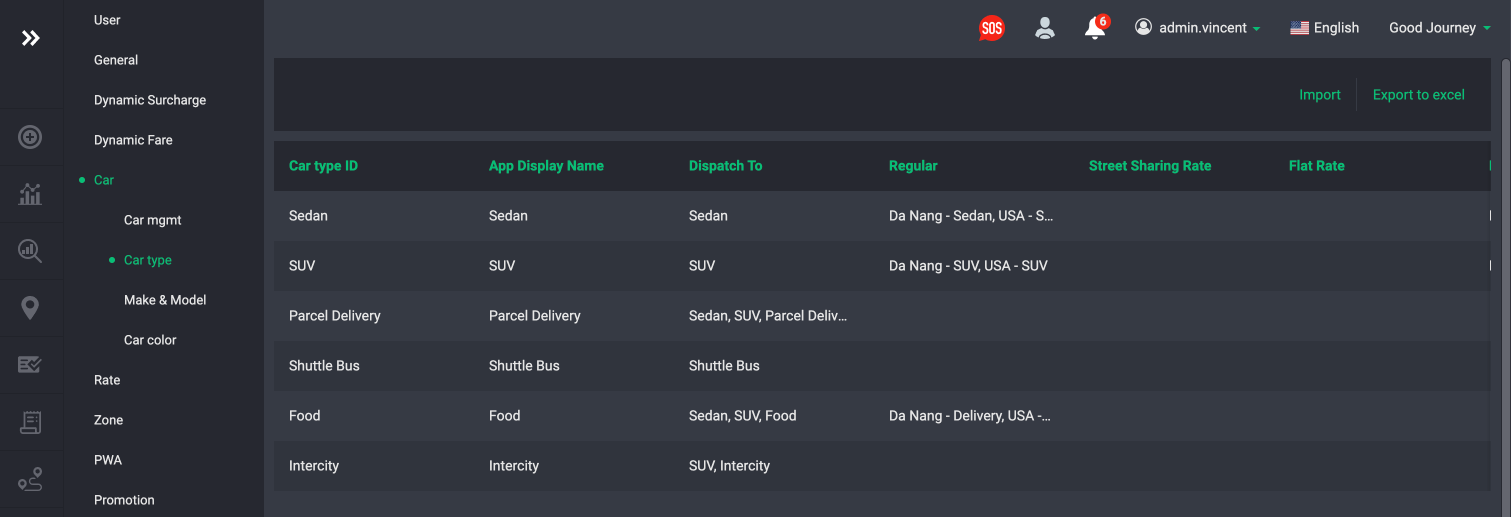
How to apply rates to your car-type
To assign a rate to a car-type navigate to Settings > Car > Car type
Scroll to the right and tap on the action bar icon and select Assign Rate
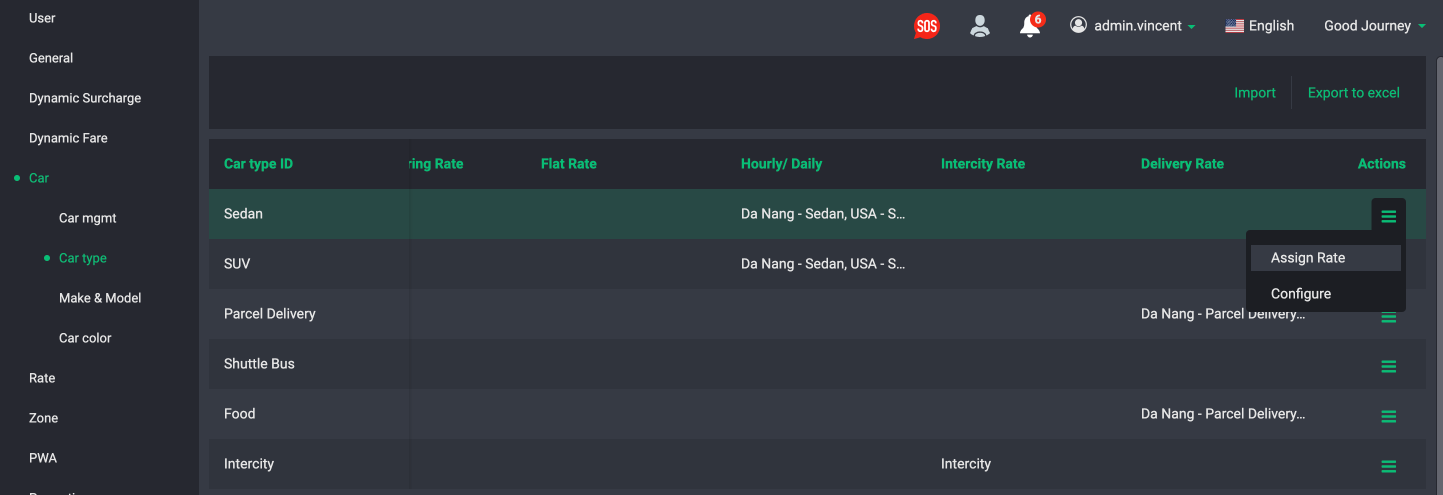
Here you can assign the regular rates, flat rates, and hourly rates to a specific car-type. Once everything looks good you can save.
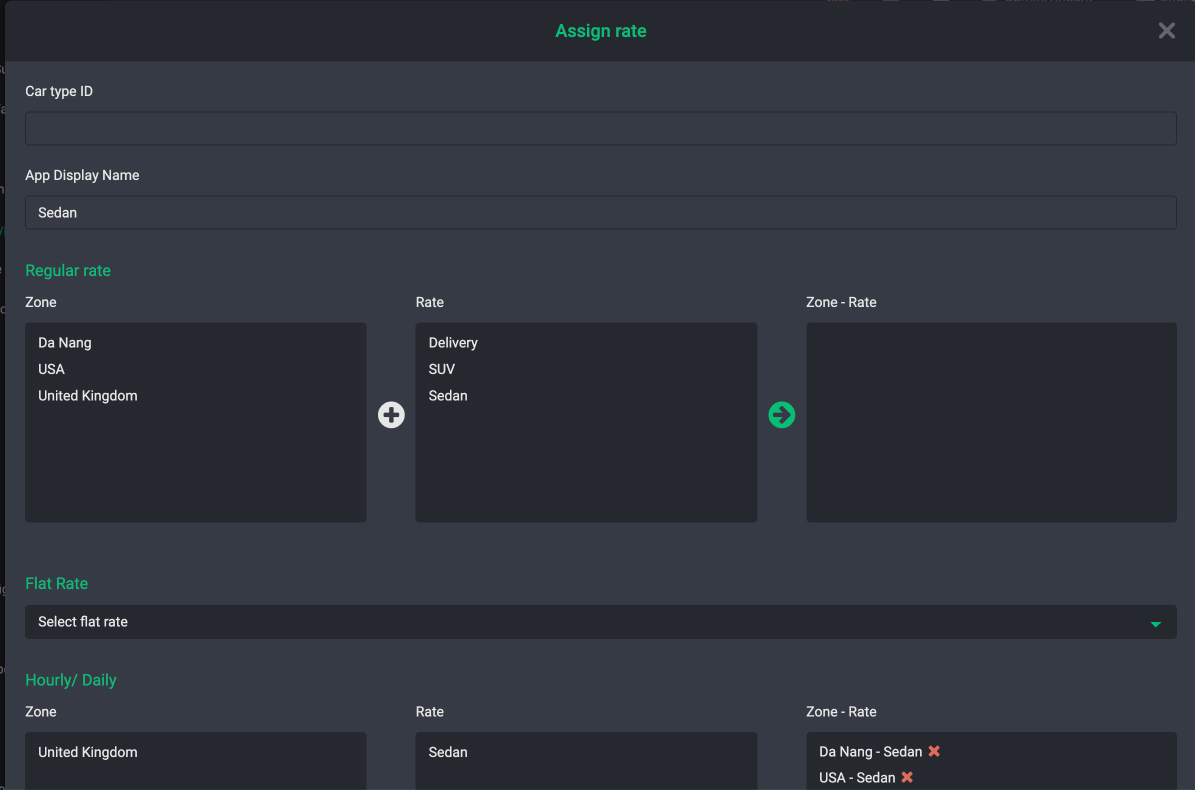
That's all you need to assign rates! Now to validate your rates are correct?
How to test your rates?
Before you launch your service it's important to test your rates and pricing are correct before you market and sell to your customers. Incorrect rates could cause a negative impact on your business especially when your competitors are offering a cheaper price.
There are a few ways to test if your pricing is correct. Create a test booking with the following products:
- Command center
- Customer app
- Customer web app
