Introduction
Welcome to our comprehensive tutorial, designed to guide you through the seamless integration of your VoIP phone system with your fleet management dashboard using the Vonage Web Launcher. This integration is key to enhancing the efficiency of your call support center operations.
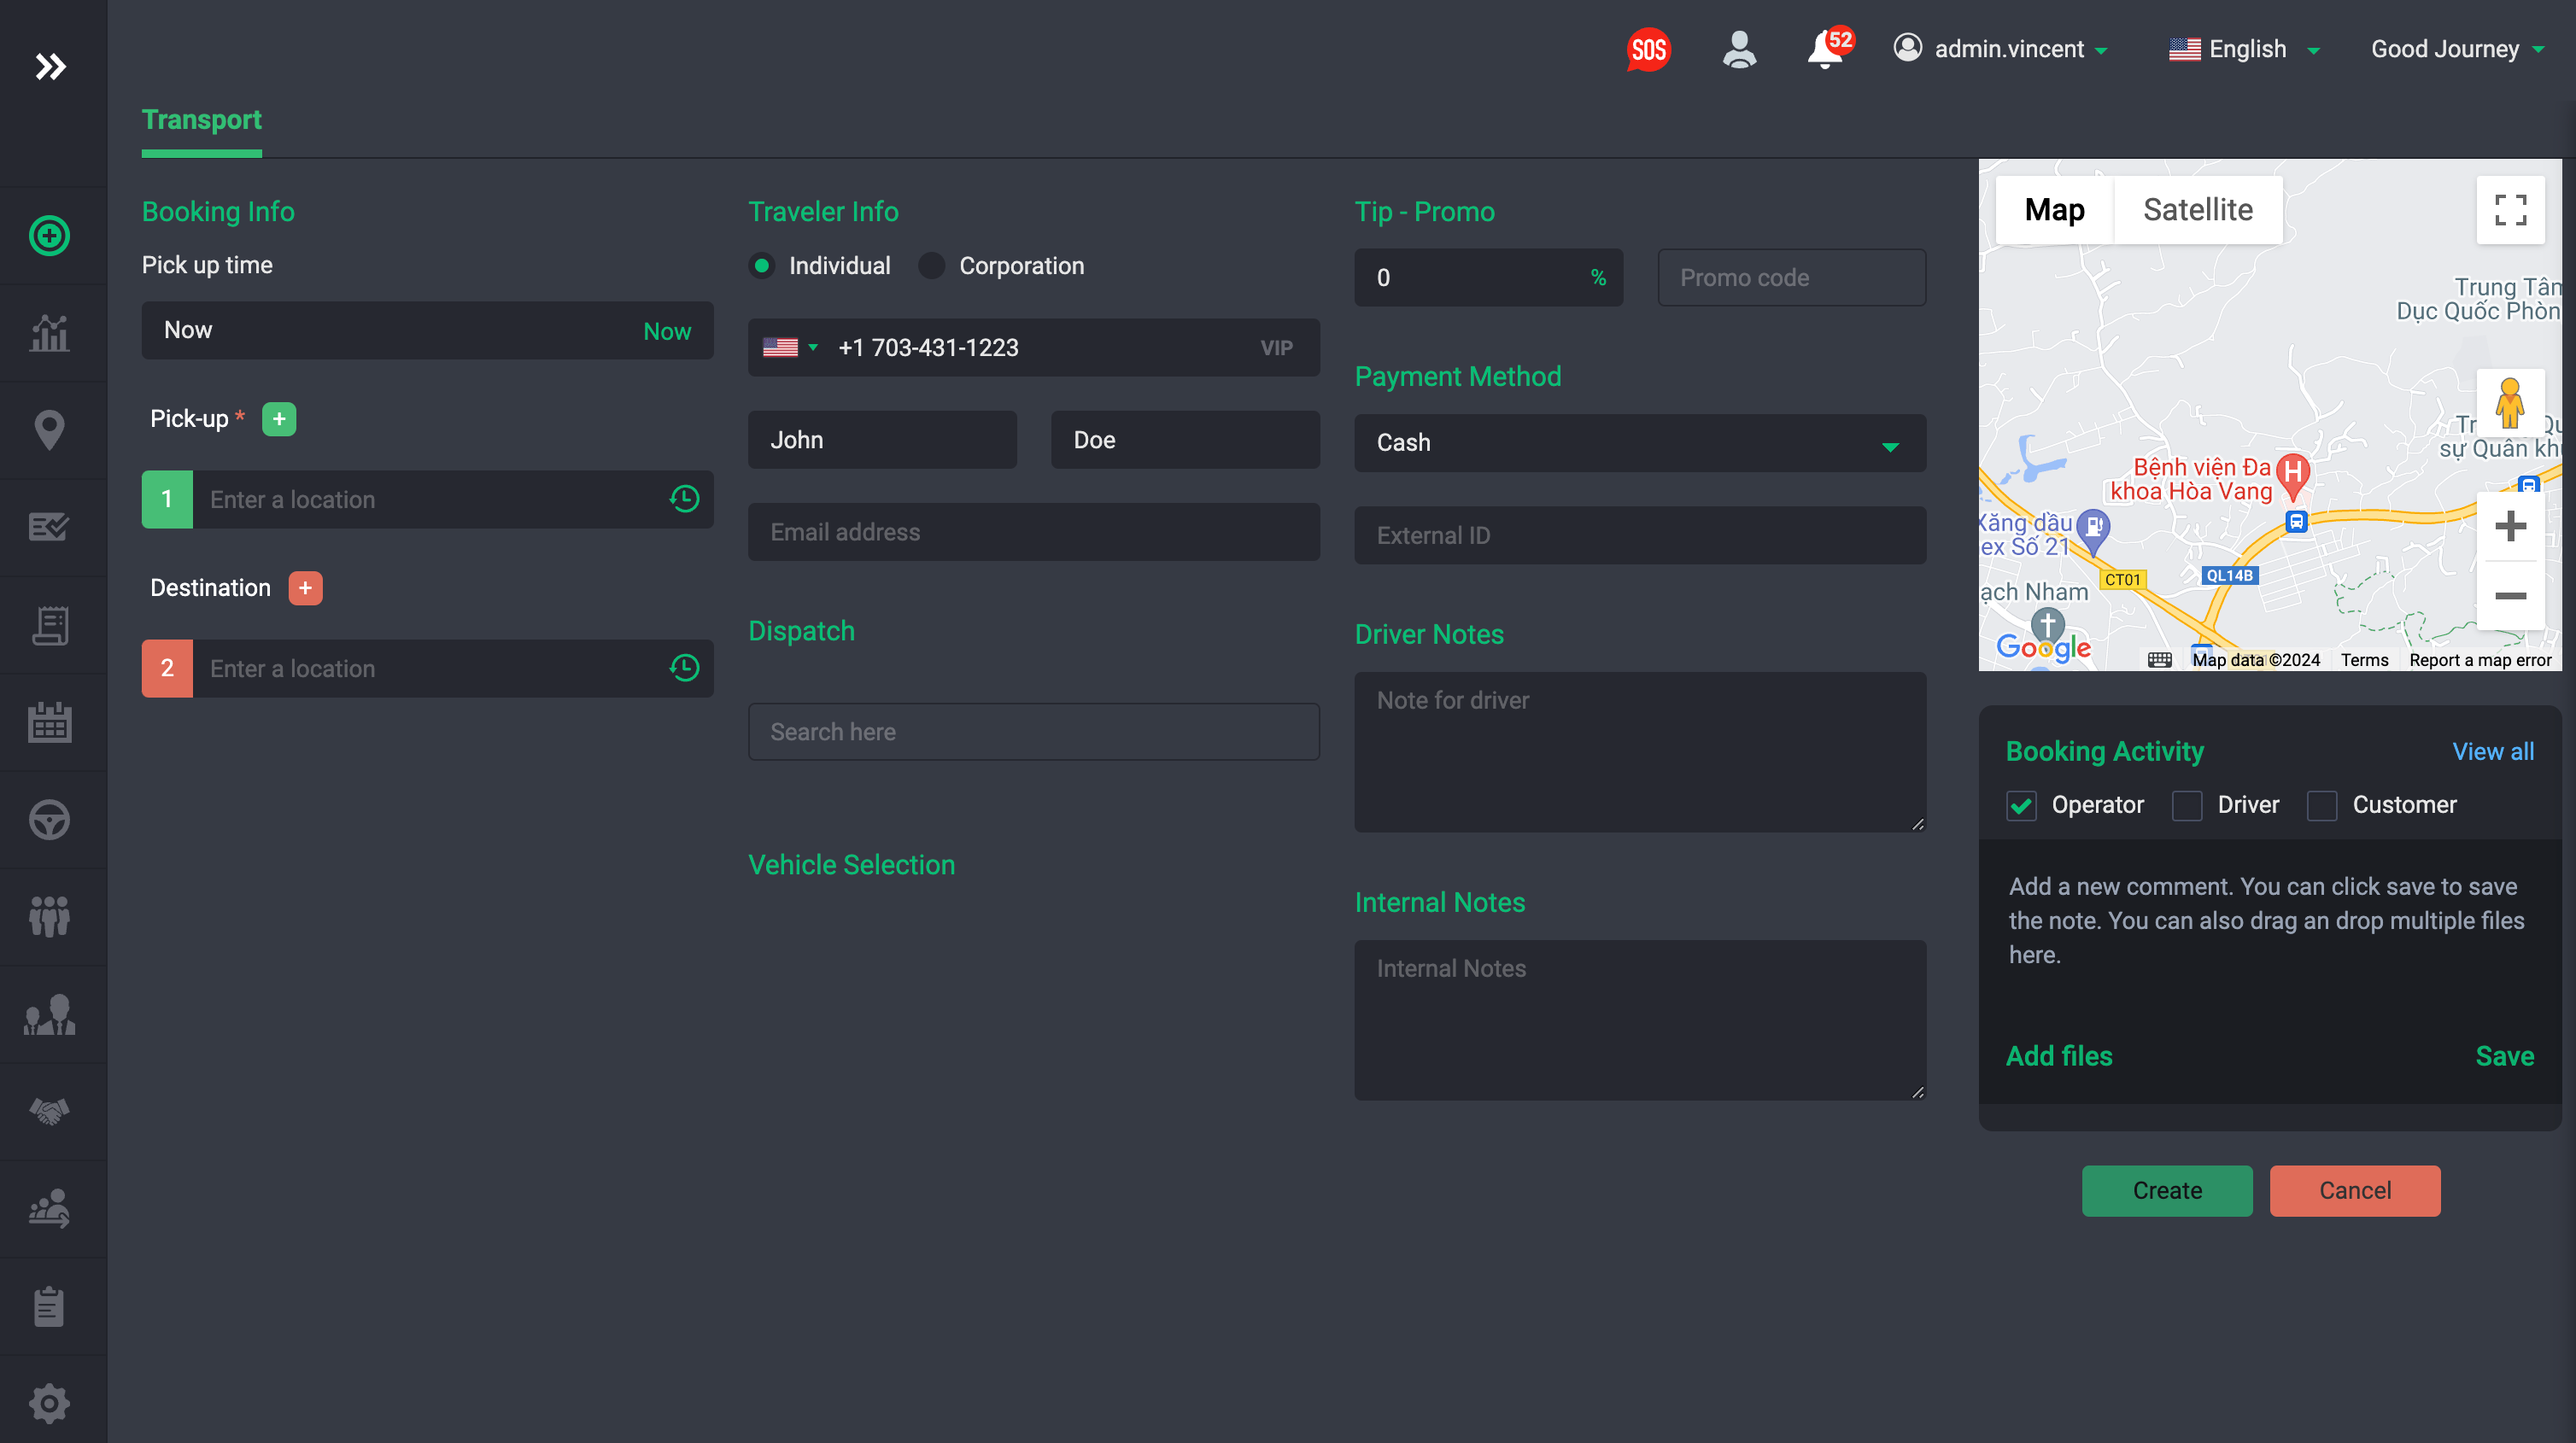
When a customer reaches out to your support center, our system instantly captures their phone number, initiating an automatic search to retrieve their existing profile. This includes essential information such as the customer's name, phone number, email, and recent addresses.
This process empowers your team with immediate access to critical customer details, enabling them to deliver exceptional service. Furthermore, it streamlines the process of creating trips directly during the call, significantly improving response times and overall customer satisfaction. Join us as we walk you through each step of setting up this integration, ensuring you can leverage these benefits to the fullest.
Navigate to Settings
- Download the vonage business desktop app here
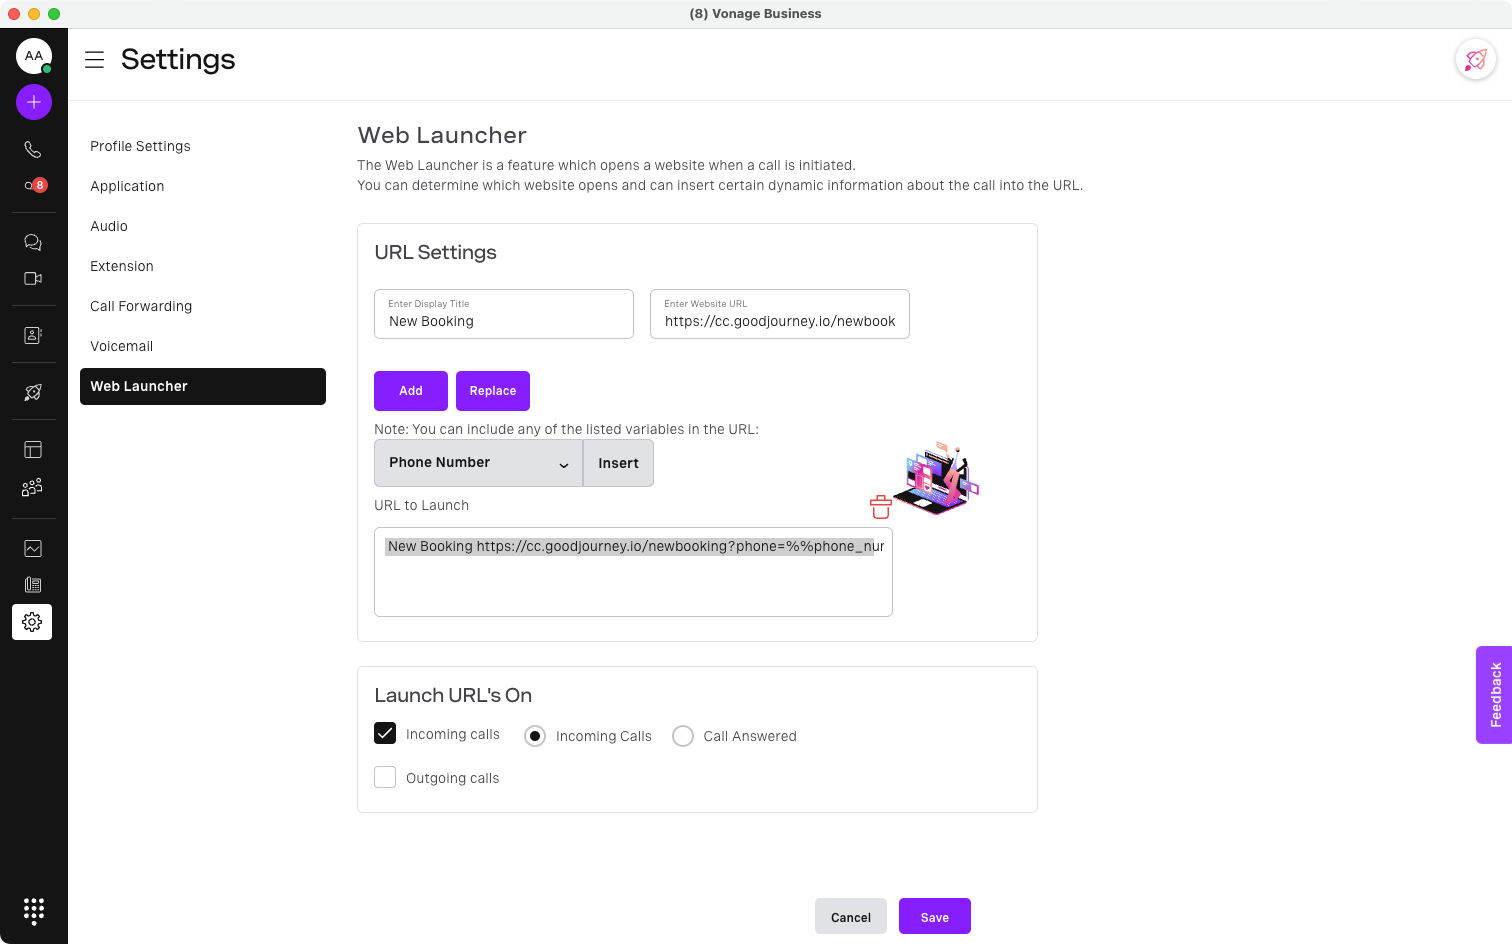
- Navigate to Settings → URL Launcher as shown below:

2. Configure the Web Launcher
- Enter the display name, for example (New Booking)
- Enter the website URL:
https://cc.goodjourney.io/newbooking?phone=%%phone_number%%Once done tap the Save button.
It should look something like this:
3. Things to take note of
It's important to make sure the dispatcher or operator is logged into the command center. Otherwise it will redirect them to the login page. We recommend having a different account for each call center operator or dispatcher. One login per user.